Waterproof Drywall: Essential Solutions for Moisture-Prone Areas

Waterproof Drywall: Essential Solutions for Moisture-Prone Areas

Drywall
By Contractors.com Team September 09, 2024

When building or renovating moisture-prone areas, choosing the right materials is essential. Waterproof drywall, also known as moisture- or mold-resistant drywall, is designed to withstand humid environments like bathrooms, kitchens, and basements. It helps prevent mold growth and extends the life of your walls, keeping your home safe and looking good.

Although not entirely waterproof, this drywall offers better moisture protection than standard drywall and contributes to improved indoor air quality. Proper installation is crucial for getting the most out of it, including the use of specific drywall tape and mud for a smooth finish. In this review, we will cover different types of waterproof drywall, provide installation tips, and discuss the best uses for each.

Ensure durability and prevent mold in your home by installing waterproof drywall in moisture-prone areas like bathrooms and kitchens.

Ensure durability and prevent mold in your home by installing waterproof drywall in moisture-prone areas like bathrooms and kitchens.

Basics of Waterproof Drywall

Waterproof drywall is crucial for moisture-prone areas. Understanding its composition and how it resists water can help you make informed choices for your home or project.

Composition and Materials

Waterproof drywall is made from moisture-resistant materials. It typically has a gypsum core enhanced with water-resistant additives, making it less permeable. Instead of traditional paper, the facings are usually fiberglass, which helps prevent mold. Together, these elements create a durable product ideal for damp areas like bathrooms, kitchens, and basements.

Waterproofing Mechanism

Waterproof drywall's effectiveness comes from its unique construction and treatment. The fiberglass facing acts as a barrier, keeping moisture from reaching the core. For added protection, waterproofing paints or membranes can be applied. When installed properly, this drywall reduces the risk of mold and water damage, making it ideal for high-humidity areas where standard drywall would not hold up. It also ensures greater durability and longevity.

Installation Techniques

Installing waterproof drywall requires careful preparation, the right tools, and a step-by-step approach to ensure a moisture-resistant finish.

Install waterproof drywall properly to protect your home from moisture and ensure a long-lasting, mold-resistant finish.

Install waterproof drywall properly to protect your home from moisture and ensure a long-lasting, mold-resistant finish.

Preparation and Tools

Before you begin, gather essential tools, including:

  • Drywall saw or utility knife
  • Drill with drywall screws
  • Drywall tape
  • Measuring tape
  • T-square

Use moisture-resistant drywall (green board) in damp areas. Clear the workspace of debris and ensure proper ventilation. Inspect the framing for signs of mold or water damage and address any issues before starting installation.

Step-by-Step Installation

Start by measuring and cutting the drywall to fit the space, using a T-square for straight, clean cuts. Secure the drywall to the framing studs with screws spaced about 16 inches apart. Countersink the screws slightly for a smooth surface.

Cover the seams with drywall tape, applying it from top to bottom for a consistent finish. Stagger the joints between boards for added stability, and press the tape firmly into the drywall mud to prevent air bubbles.

Sealing and Finishing

Properly sealing the joints is key to ensuring waterproofing. After installing the drywall:

  • Apply joint compound over the taped seams with a putty knife, smoothing it out for an even finish.
  • Once the compound dries, sand it smooth and apply another layer if needed.
  • Finally, seal the corners and edges with waterproof paint or sealant after the joint compound has fully dried.

This extra step provides added moisture protection, making the drywall more durable in areas like bathrooms and kitchens.

Applications and Uses

Waterproof drywall is designed for moisture-prone areas, making it suitable for both residential and commercial use.

Use waterproof drywall in bathrooms, kitchens, and basements to protect against moisture and extend the life of your walls.

Use waterproof drywall in bathrooms, kitchens, and basements to protect against moisture and extend the life of your walls.

Residential Use

Waterproof drywall is ideal in homes for bathrooms, kitchens, and laundry rooms where water exposure is common. Green or purple boards resist moisture and help prevent mold growth. It’s also a good choice as a backing for tiles in shower areas, providing extra protection against water damage. Additionally, using it in basements or humid spaces helps create a healthier environment by reducing the risk of mold and mildew.
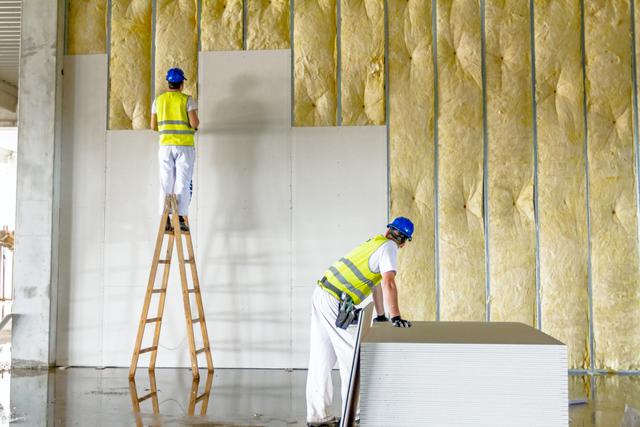
Commercial Projects

Commercial buildings often need more durable solutions due to high traffic and potential water exposure. Waterproof drywall is commonly used in hospitals, schools, and restaurants. In these settings, moisture-resistant panels enhance durability, and high-impact areas may require panels that meet ASTM standards.

In kitchens and restrooms, waterproof drywall helps preserve structural integrity and ensures compliance with health regulations. Choosing the right type can reduce maintenance costs and extend the lifespan of the walls in commercial applications.

Maintenance and Care

Proper maintenance of waterproof drywall is essential for its longevity and effectiveness. Regular cleaning and timely repairs can help prevent damage and extend its lifespan.

Cleaning Guidelines

Regularly inspect the drywall for signs of moisture or damage, such as discoloration or damp spots. For routine cleaning, use a soft cloth or sponge with mild detergent. Avoid harsh chemicals that can damage the material.

Cleaning Tips:

  • Dry Cloth: Use a microfiber cloth for dusting without adding moisture.
  • Wet/Dry Vacuum: Ideal for larger areas to avoid water damage from excess moisture.

After cleaning, rinse off any detergent residue and thoroughly dry the surface to prevent dirt buildup.

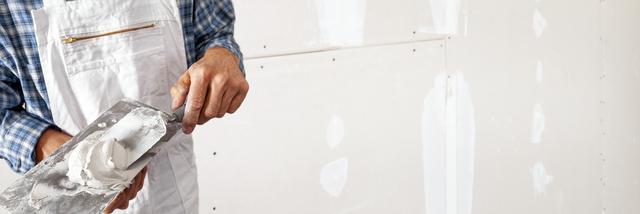
Damage Prevention and Repair

Preventing damage is key. Regularly check for leaks in pipes or roofs, which can lead to moisture issues. In humid areas, use a latex-based waterproofing primer on seams and edges for added protection.

Repair Steps:

  • Identify Damage: Look for cracks or deterioration.
  • Seal Cracks: Use an appropriate sealer for visible cracks.
  • Patch Holes: Apply drywall tape over the holes, followed by the joint compound. Once dry, sand the area for a smooth finish.

Addressing damage promptly will help prolong the life of your waterproof drywall.

Written by
Contractors.com Team

Written by Contractors.com Team

Welcome to the Contractors.com Team, a group of passionate individuals dedicated to helping homeowners achieve their dream home through the best-in-class service providers and inspiring content.


We believe that every homeowner deserves to have a home that they love, and we're committed to making that a reality. Whether you're looking to remodel your kitchen, renovate your bathroom, or build your dream home from scratch, we've got you covered.


When it comes to creating content, we take a multi-faceted approach. We gather insider tips from experts in the home service industry, and do our own thorough research to write informative and engaging articles that are tailored to our readers' needs. At the same time, we harness the power of A.I. and GPT-3 technologies to generate titles, headlines, and even entire articles that are optimized for SEO and designed to provide value to our readers.


We're committed to providing the best possible service to our readers, and we're always looking for ways to improve. Whether you're a homeowner looking for inspiration or a service provider looking to join our network, we're here to help you achieve your goals.

comments