A raised garden bed looks cute and will save you from breaking your back for all your gardening tasks. You’ll be glad to hear it’s also a very easy DIY project. It’s so easy in fact that you can just do it with basic hand tools (no need to get that scary power drill out). Building a raised garden bed is also a good opportunity to get your feet wet with some construction fundamentals since it runs through the basics of carpentry and outdoor DIY projects. Also known as a garden box, a raised garden bed is a great example of how a small addition to your backyard can go a long way towards improving the organization of your garden. You don’t need all that much to put together a whole bunch of these things, but it will make your backyard much more usable.

Why a Raised Garden Bed Is the Perfect Addition to Your Backyard
In other words, garden boxes are a cheap and easy way to get more involved in backyard gardening. Whether you want some nice raised flower beds or just a place to grow some herbs, building a garden box is a good place to start.
The Benefits of Raised Bed Gardening
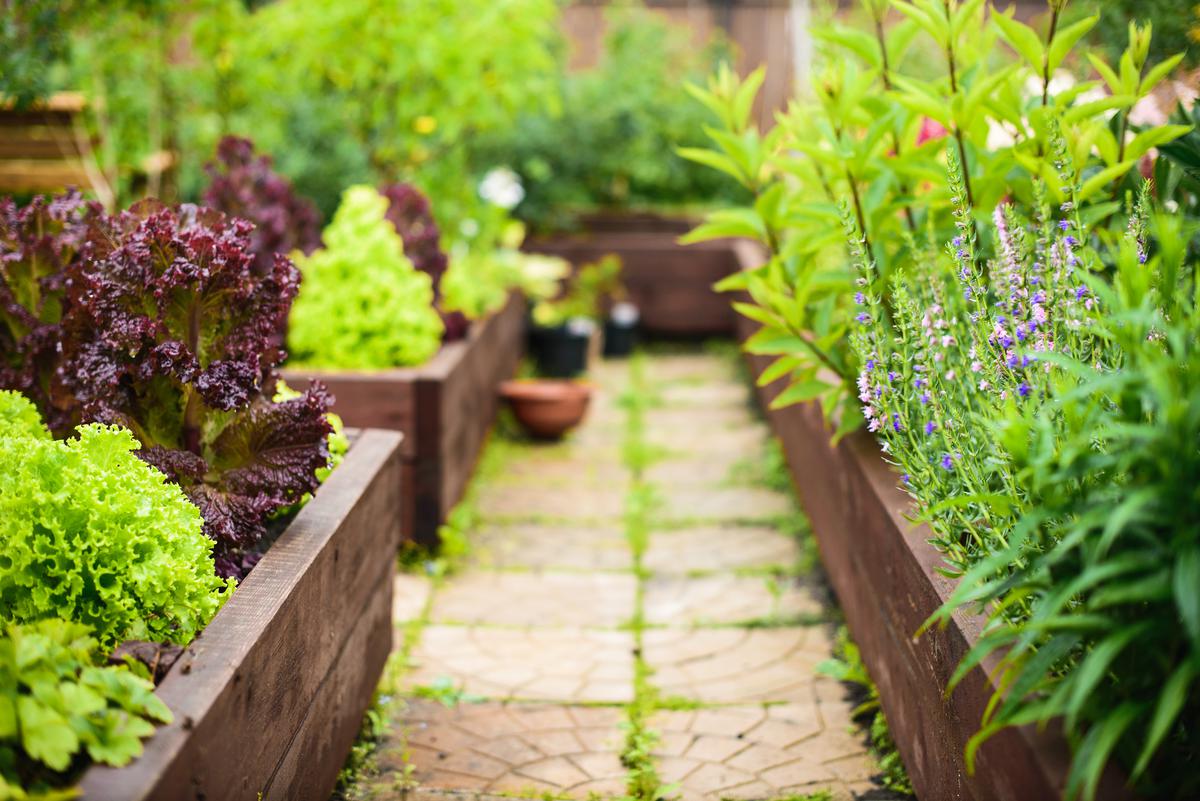
There are some sweet benefits to building a DIY garden bed. Raised garden beds are perfect for growing veggies, herbs, and flowers because they keep out weeds and pests like snails. A garden bed also keeps your soil from washing away in a storm and helps with draining water so your plants don’t drown. Another great thing about garden beds is that they make it possible to plant earlier in the season because your soil will be warmer. If you build many raised garden beds, you’ll have an ideal setup for square foot gardening.
The Benefits of Raised Bed Gardening
If you have a bad back, raised garden beds have the added benefit of reducing back strain since you don’t have to bend over as far. Because a garden bed doesn’t have a bottom, the roots of your plants can further into the ground where there are more nutrients.
What You’ll Need
Cedar is the recommended wood for building raised garden beds since it is naturally rot-resistant. Some government health agencies advise against using treated wood for edible gardens due to health concerns. In the right conditions, some types of cedarwood garden boxes can last 15 years or more before they need to be replaced.
You can buy lumber in the form of 2x4s, 2x6s, or 2x8s. It all depends on how big you want your raised garden bed to be. The 4x4s will be used for corner posts. It is possible to use different sizes, but you need to make sure that the corner posts are at least 10” longer than the height of the bed. In terms of screws, look for coated deck screws that are 2-½” minimum.
You’ll need at least six screws for each corner post of the raised garden bed. If you opt for the 2x8s, it’s recommended that you have mid-span posts for each wall of the garden box. These mid-span posts will need at least two screws each.
How to Build Your Garden Bed
1. Make a raised garden bed plan.
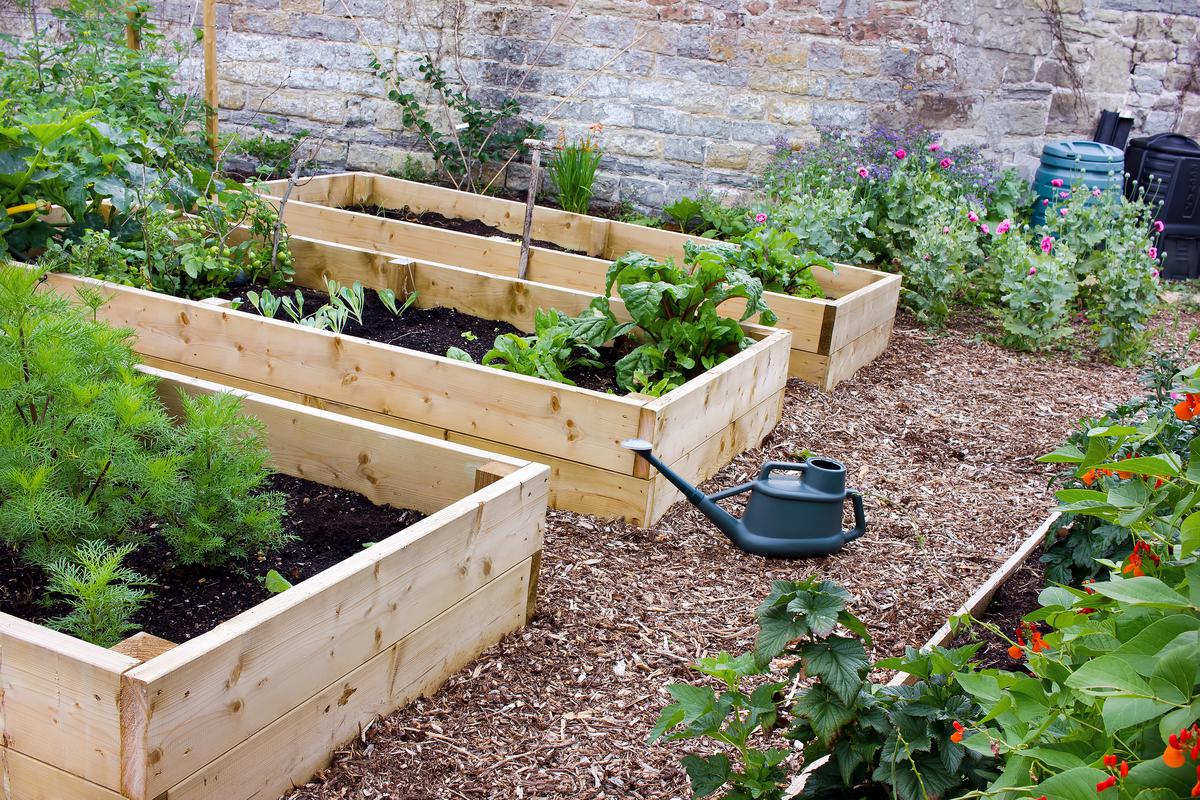
When designing your garden box, you should consider some limitations. The typical garden bed is no more than four feet wide and twelve feet long. A garden bed that exceeds these dimensions will be rather expensive. It will also be less practical since it would be difficult to access without stepping on soil (which you want to avoid). The minimum height of a garden bed is 6 inches. If your raised garden bed is up against a wall or fence, you should limit the width to three feet. Otherwise, you may not be able to easily reach all the plants in the garden bed. If you want to build several garden boxes, make sure you leave at least two feet of space between them so that you have room to access them.
2. Cutting and assembling.
You’ll be assembling your garden box on-site, so clear the spot where the bed will go. After cutting the lumber to the desired length, you can put the walls of the bed in place, and level them with some wood blocks placed underneath the ends and the sides. You don’t need to put in all the screws at this point, so just put in two for each corner so the structure holds.
Once this is done you can drive in the four corner posts and screw them into the boards. Use two screws per side for each post. The posts will protrude over the walls by a few inches, so saw them until they are flush with the sides. The process is the same if you plan to install mid-span posts. Once this is done, you can fill in the gaps between the boards and the ground with soil.
3. Cross-bracing.
If your bed is longer than eight feet, it is recommended that you put in some cross-braces. This will keep the garden bed sides upright and prevent bowing. You can cross-brace the garden beds with some two or three pieces of aluminum flat stock. These pieces should be cut to the width of the box and secured to the side posts with a screw on each side.
4. Put in the mesh, fill the bed with soil.
Before you fill in the box with soil, be sure to line the base of the bed with builder’s paper to help with drainage. You can also line the bed with galvanized mesh to keep out pests, but this is optional. Be sure to set this mesh at a good depth if you plan to raise plants that have long roots (like potatoes and carrots). You want to fill your bed with store-bought soil because it will be mostly rock-free.

5 Steps to Setting Up a Raised Garden Box
5. Get gardening.
You’re all done. This step leaves you with a tip to bear in mind. Avoid stepping on the soil, and try to keep animals off it as well. Stepping on the soil will compact it and reduce aeration.

Reaping the Benefits of a Garden Bed At Home
What to Grow in a Garden Bed
Of course, that still begs the question. Namely, what do you grow in a garden bed? The answer is many things. Listing the huge number of vegetables and flowers you can grow in a raised garden bed would require a separate article. Suffice it to say, you won’t need to buy cherry tomatoes from Trader Joe’s anymore if you build a garden box. If you decide to try your hand in French intensive gardening, you might not need to go and buy any vegetables from any supermarket. This technique allows you to produce a big harvest from a small box and is ideal if you want to walk away from big agro. Chances are your vegetables will be fresher and taste better once you get your raised garden bed in place.
To maximize your vegetable yield from your raised garden beds, you need to space plants closer together. This helps to increase output and also protects the soil from erosion by forming a leaf canopy. You can also do some companion planting where you mix in different plants on the same bed so that your crop can grow. Companion plants can help attract pollinating, insects, keep away pests, or even give shade to shorter plants. For example, planting tomatoes with herb plants such as basil, rosemary, or sage will keep the shorter herb plants protected by the taller tomato plants. Combine these techniques with succession planting - immediately replacing a spent plant with a new plant - and crop rotation - where you rotate between different plants on the same bed - and you’ll have the makings of a very productive garden.

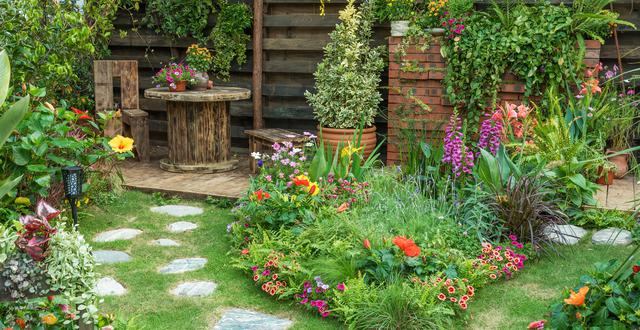
What You Can Grow In a Raised Garden Bed
If vegetables were never your thing, you can instead use your garden box to create a beautiful canvas of color and fragrance in your backyard. Think cardinals, Russian sage, and monkshood. With time your raised flower bed will flourish into a venerable display of mother nature’s botanic wonder. Enriching your soil is the best way to get flowers to thrive in your raised garden bed. You can enhance the soil by spraying it with fertilizer, lime, phosphate, and peat. Be sure to spread out the soil evenly so that all of the additives you put reach all corners of the box. You can do this easily with a rake. Follow these simple steps and you will be well on your way to a colorful flowering garden.


comments